BYOD Setup Guide
This guide is designed to help you get your computer ready for school use. If you do not feel comfortable completing the steps highlighted here then please bring your device along to the IT office in Popham and one of the support team will help you.
There will also be a number of scheduled drop-in sessions, in houses, at the start of term, to get you setup.
1. Turning on for the first time
When you start a brand-new Widows 11 computer you will enter the Out of Box Experience mode (OOBE). Follow the steps to turn your computer on and add an account to it. You will need to use a Microsoft account that is a personal one, not a ‘Work or School’ account. You have the opportunity to create one during this process if you do not have one.
How to: Complete the Windows 11 Out of Box Experience - Microsoft Community
2. Installing all available updates
- Select Start > Settings > Windows Update and, next to Get the latest updates as soon as they're available, set the toggle to On.

- Select Check for updates and if any updates are available for you, your device will download and install them. If prompted to do so, restart your device to apply the updates. This process may take some time.
3. Install Anti-Virus software (optional)
Any computer device that is connected to the internet can be a target for malware such as viruses. Windows includes Windows Security which is a good minimum.
The school provides free access to Sophos Home Premium for students and their families while you are at school. We strongly recommend that you install this on your devices.
Click on this link
Commercial Use Edition: Sophos HOME to get a free licence, the product can be installed on up to 10 devices in your household.
4. Sign in to OneDrive
Start OneDrive and add your school account to get access to your files
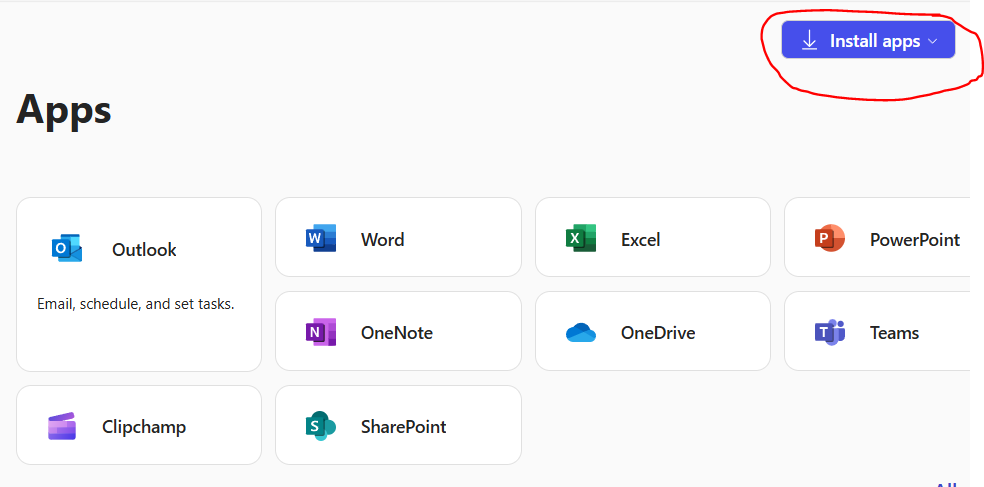
5. Install Microsoft 365 Apps
Go to
https://m365.cloud.microsoft/apps/ and sign in with your school email address and password
Click on the ‘
Install apps’ button near the top right of the screen
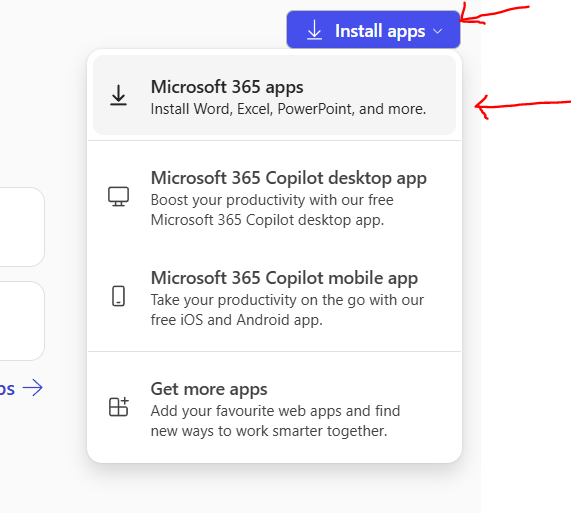
Select
Install apps, followed by "Microsoft 365 apps"
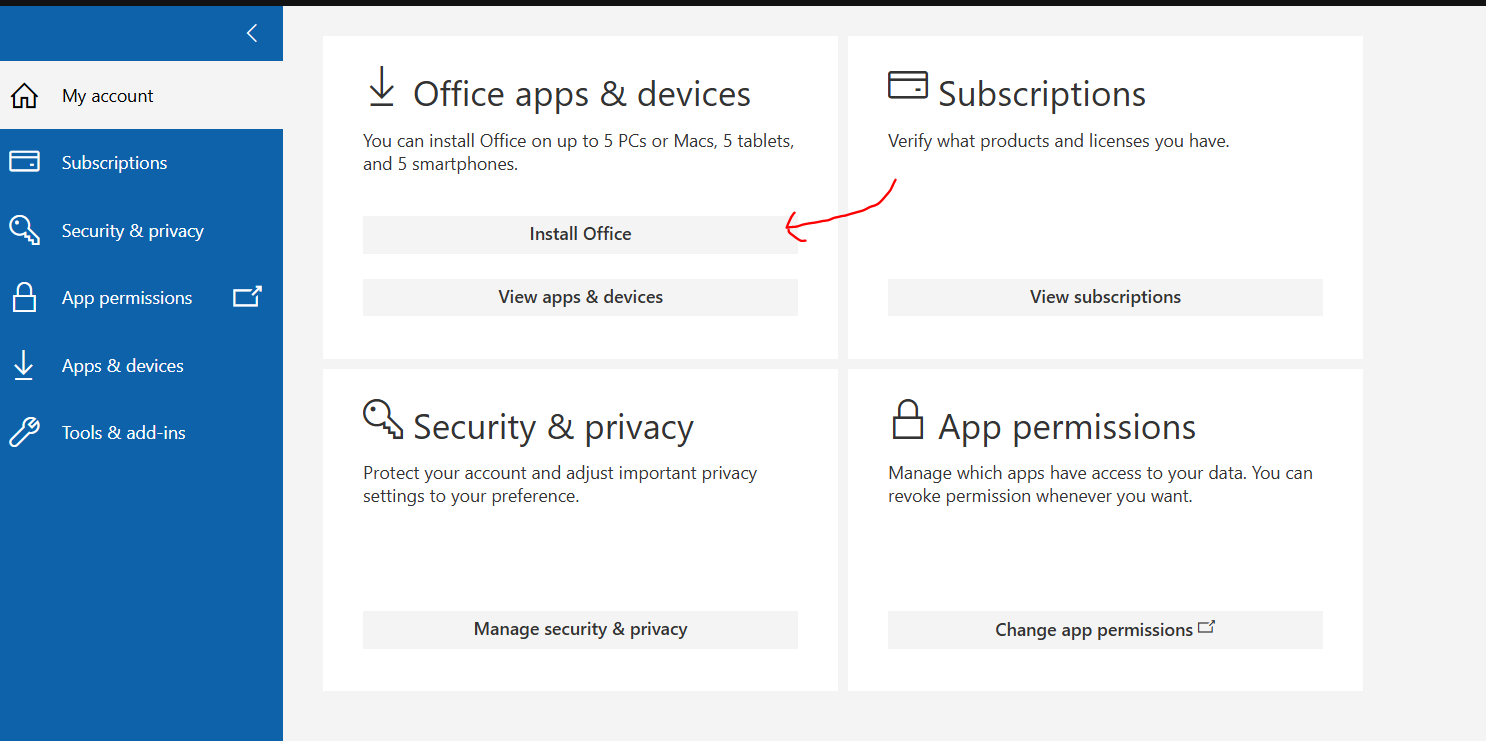
Select
Install office, to download the "OfficeSetup.exe" installer and open it once it has finished
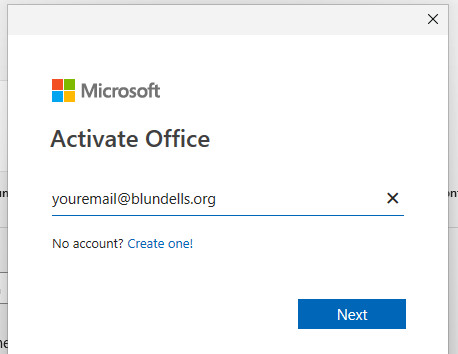
Then click on the downloaded file.
Once installed you need to sign in with your school email address to activate your licence. Open any Office application, the example below is using Word.
- Click on Change

- Sign in with your school email address and password
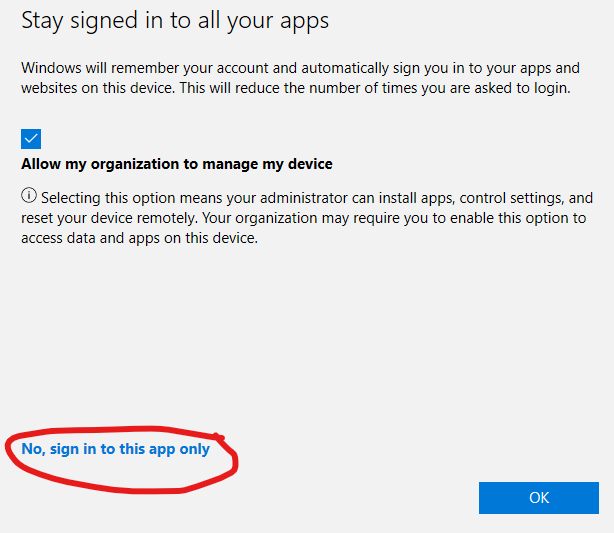
- When asked if you want to 'Stay signed in to all your apps' please select 'No, sign in to this app only'. NB this is important, if you just click on OK here you device will be joined to the school management system. This will mean that you will be required to get permission to install apps from the Microsoft store. If you clicked on the wrong button you can follow this guide to disconnect from school - How to undo "Allow my organization to manage my device" in Microsoft - Microsoft Community
-

- You should now be signed in, the top of the app window will display your name and profile image.
6. Sign in to Outlook
- Open Outlook
- The suggested accounts screen should show the Microsoft account you used in step one. You should also be able to choose the one you used to sign in to Word in the previous step.
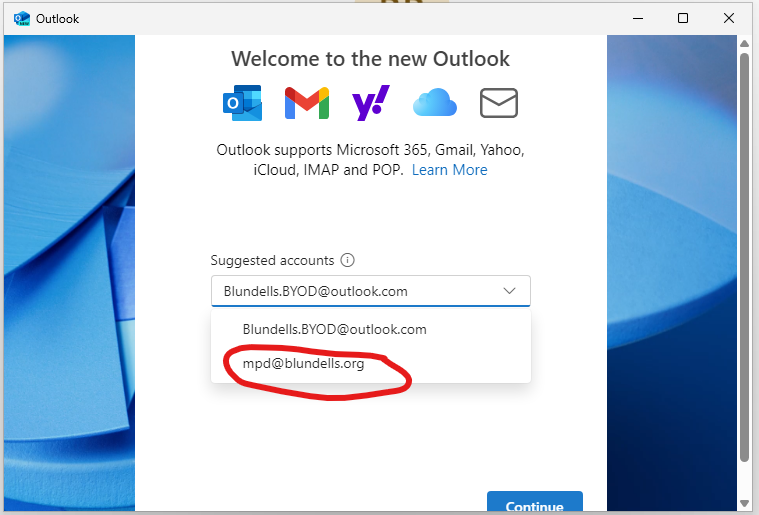
- Select your school account and click Continue
- Enter your password
- When asked if you want to 'Stay signed in to all your apps' please select 'No, sign in to this app only'
7. Sign in to Teams for Work or School
When you open Teams it will sign in automatically using the Microsoft Account used earlier in step 1. You need to sign in using your school email address to access your class Teams.
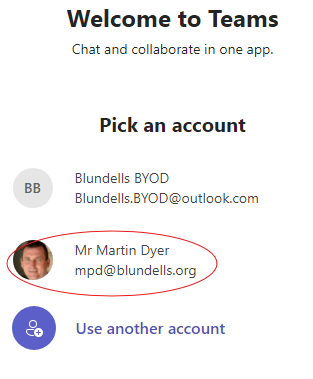
- Open Teams
- On the Welcome to Teams page select Use another account
- Pick your account from the list of options
- Enter your password and select 'No, sign in to this app only'
8. Sign in to OneNote
If you have followed the steps above OneNote should already be signed in as you
- Open OneNote
- Checked the name and image shown top right of the screen, it should be your school account

- If it is not, click on the name and either select the correct one from the list of options or Sign in with a different account
Help guides for the software